If you’re committed to strength training, commuting back and forth to a gym can be a massive waste of time. Therefore, training at home can offer an enormous advantage in building a consistent routine.
Of course, executing heavy strength training at home requires a dedicated space alongside specialized equipment; that’s what this guide is about.
If you’re willing to consider setting up a strength cave at home, your first order of business is to understand the equipment you’ll need.
To keep things simple, I’m going to share equipment offerings from Rogue Fitness.
These aren’t affiliate links and I’m not sponsored in any way. I’m highlighting Rogue because I think they’re a fantastic company of high integrity with a huge selection of equipment that will cover any sized space you have.
For a world-class strength facility in your own home, this is about all you need:
- Squat/Power Rack
- Barbell
- Weight Plates
None of this equipment is complicated, but it does require enough ceiling height and floor space to be used safely and effectively.
That brings us to step one in our guide:
1: Think about your space
In my small house, the garage is the ideal space for strength training; here’s why.
- The garage is the furthest point away from our bedrooms, allowing me to train early in the morning without disrupting sleeping kids.
- The garage is a flexible space, meaning I can back the car out and immediately triple my floor space for workouts, then return equipment to the corner when the car needs to go back in the garage.
Whatever spot works best for your strength cave, the next step is to grab a measuring tape.
- Measure Floor Space
- For a functional barbell training space, you’ll probably need at least an 8′ X 8′ patch of floor
- Measure Ceiling Height
- For a full-sized squat stand/rack you’ll want at least an 8-foot ceiling, for ceilings under 8 feed your options will be limited
Once you’ve confirmed the general measurements of your space, put down masking tape on the floor to better visualize your strength cave footprint.
Does the car still fit? Can you still open the doors in the garage as needed? If you’re comfortable with the commitment of floor space, the next step is to begin looking at equipment.

2: Choose a stand or rack

Your most critical equipment will be a squat stand or power rack. If your ceilings are under 8 feet, you’ll likely be limited to a shorter squat stand like the one pictured.
A squat stand won’t have the flexibility of a full power rack, but you’ll still be able to perform most basic barbell movements safely and without compromise. Just purchase a pair of safety spotter arms to lift safely alone.

If your ceiling height isn’t a concern, a power rack is your best option.
While you might be tempted to opt for a cheaper squat stand, a power rack gives you the option to do pull ups, set-up multiple lifting stations, and store weight plates, all with a similar footprint to a squat stand.
In simple terms, a power rack takes up roughly the same space as a squat stand, while offering more functionality.
Power racks come in all shapes and sizes. Bolt down, freestanding, wall-mount/foldable, and even doorway mountable. Consider your training space limitations and pick an option that works.
Once you’ve chosen a rack, mask out the footprint of the rack within the training space you’ve already settled on. These two measurements will give you an even clearer picture of how much space you’ll need to train.
Now you’re ready to move on to our third step; choosing a barbell.
3: Choose a barbell

Barbells are like bikes, they come in every imaginable shape, size, and finish. Most bars for men are around 28mm in diameter, women’s around 25mm. Other than diameter, men’s and women’s bars are generally the same.
Since there are numerous comprehensive guides covering all types of barbells, I’ll jump straight to the punch line.
If you’re training in a small space, I think “shorty” barbells are the best option.
Shorty barbells work just the same as a traditional length barbell but will save you at least 15″ in total length. This saved length can make a significant difference when moving around in a small training space.

Once you’ve picked out a barbell, measure out how ≈ 72″ (for a shorty) or ≈ 86″ (for a traditional) will sit in your rack.
Think through the process of loading plates. Do you have enough space to access each side of the barbell comfortably?
Taking a few minutes to experiment with how you’ll move in your training space will save you a ton of time and frustration when you’re finally ready to put everything together and start lifting.
Once you’re comfortable with how your rack and barbell fits in your training space, it’s time to look at weight plates.
4: Choose weight plates

No need for a full review of weight plates since several have already been done on the Youtubes, but I do want to highlight one point about plates.

Bumper plates are bulky and annoying to move around in a tight training space. They’re also harder to store on a compact power rack without impeding the path of the bar during lifts.
In a practical sense, you’re better off choosing a classic iron plate with a wide lip or some other multi-grip design, which makes plates easier to store, grip, and load onto the bar.
Which plate denominations should you buy? If you plan to lift alone, this combination should meet your needs for a long time.
Lifting Solo Plate Combinations
- 2 X 2.5lb
- 2 X 5lb
- 4 X 10lb
- 2 X 25lb
- 4 X 45lb
If you see yourself being years out from hitting over 300 lbs on a deadlift, shave off a pair of 45s and save some money.
If you plan to lift with a partner, you’ll want a few more plates to keep the workout moving and prevent either of you from having to wait to use a certain plate. If you’re both strong, add more 45’s as needed.
Lifting w/Partner Plate Combinations
- 4 X 2.5lb
- 4 X 5lb
- 8 X 10lb
- 4 X 25lb
- 4 X 45lb
Once you’ve figured out the plates that will work best in your home gym, your next step is to think through how you plan to store them.
5: Consider Storage

If you want your home gym to be efficient, more enjoyable to use, and less likely to cause injury, make a plan for storing your plates and barbell/barbells.
If you went with a squat stand, your best option for plate storage is probably on the wall.

If you go with a power rack, you’ll have the option to use storage pins to mount your plates on the rack posts.

If you’re storing a single barbell if will probably be easiest enough to leave in the rack. If you’ve got more than one, the most efficient storage option is probably hanging them vertically on a wall.

The main takeaway for both plate and barbell storage is to plan out the most efficient path for moving equipment back and forth from storage to lifting. The least amount of friction you encounter when training in your strength cave,the more likely you are to enjoy the process throughout a season.
That leads us to our final step.
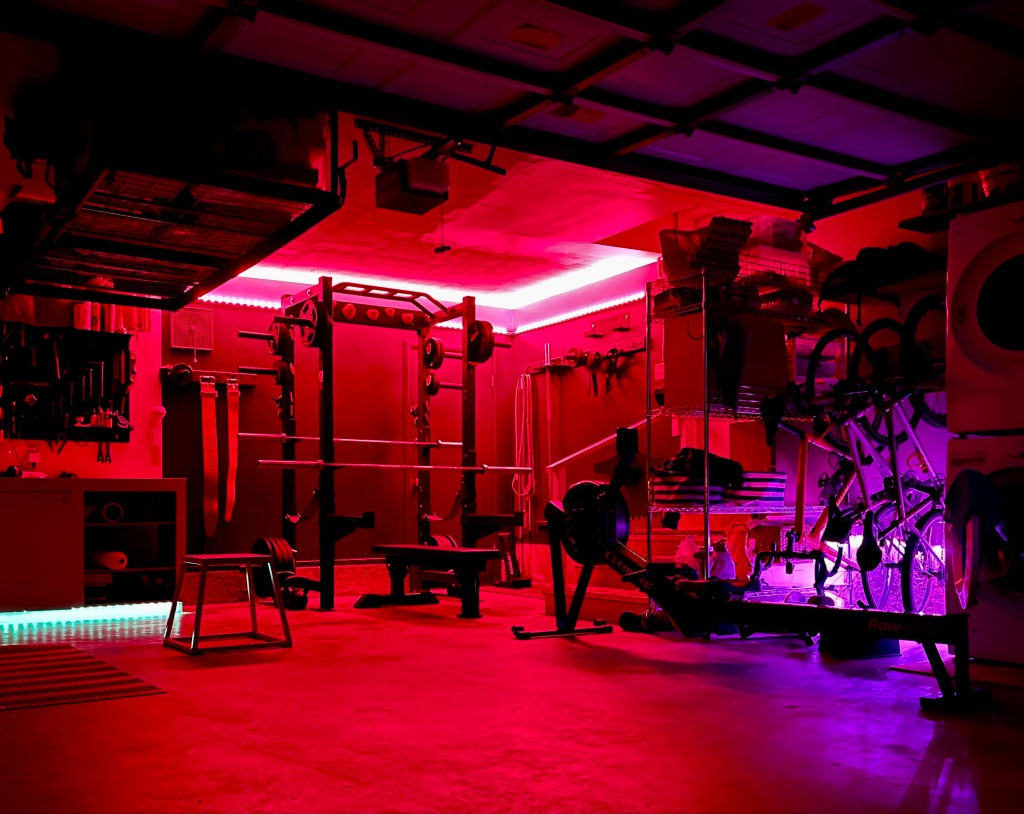
6: Tune your space

Ambiance matters, and your finishing goal is to fine tune the environment of your strength cave to create a place you want to be.
Throw some paint on the walls, add better lighting, tack up an Arnold poster, and set up a bluetooth speaker for easy music listening.
These finishing details can make a massive difference in creating a space you look forward to training in for months and years.
